Logo Logo
Result
  • Home
  • agri wealth agri wealth app bill pay app bullion bwall wp theme chaincity chaincity app coinectra coinectra app dinehaus docfinder booking template app docfinder consultation template app etrendz ex rate finounce foody friend gamers arena gamers arena app gear fixer groomify hyip pro hyip pro app ico genie lens queen list place list place app list place template app mine stack next destina pay secure pay secure app ptc pro restaurant smm matrix swift send travel advaizar trip vendor waiz zylochat
  • Get Support
  • Preview Demo
Logo Logo
  • Documentation
  • Introduction
  • Screenshot
  • Prologue
  • Release Notes
  • Upgrade Guide
  • Getting started
    • Server Requirements
    • Server FAQ
    • Installation
    • Folder Structure
    • Cron Job Setup
  • Admin Panel
  • Admin Dashboard
  • Currency Setup
  • Currencies Settings
  • Services
  • Deposit charge setup
  • Send Money / Transfer
  • Request charge setup
  • Exchange charge setup
  • Redeem charge setup
  • Escrow charge setup
  • Voucher charge setup
  • Transactions
  • Transfer List
  • Request Money List
  • Transaction
  • Payment Log
  • Withdraw Log
  • Payment Services
  • Redeem Code List
  • Escrow List
  • Dispute List
  • Voucher List
  • Store Settings
  • Store List
  • Product List
  • Referral Settings
  • Referral Bonus
  • Commission List
  • Kyc Management
  • KYC Setting
  • Edit KYC From
  • User Management
    • All User
    • Mail To User
  • Website Control Panel
    • Control Panel
    • Basic Control
    • GDPR compliance
    • Website Logo & Favicon
    • Push Notification
    • In-App Notification
    • Email Configuration
    • SMS Configuration
    • Language Setting
    • File Storage
    • Exchange API Setting
    • Plugin Controls
    • Maintenance Mode
  • Payment Gateway
    • Payment Gateway
    • Manual Gateway
  • Withdraw Gateway
    • Withdraw Method
    • Withdrawal Days Setup
  • Ticket Panel
  • Support Ticket
  • Themes Settings
  • Home Style
  • Pages
  • Manage Menu
  • Manage Content
  • Agent Module Addon
    • Agent Configuration
    • Agent Features
  • Merchant Module Addon
    • Merchant Configuration
    • Merchant Features

How to add Agent module?

Image Description Image Description

Important Notice

This article provides guidance specifically for the Agent Module Addon. Make sure you are using Pay secure version 4.0
NB: If any issue comes, contact with support https://bugfinder.net/user/support-ticket/new
  • Step 01: Create a folder named Modules in your project root (if not exists).
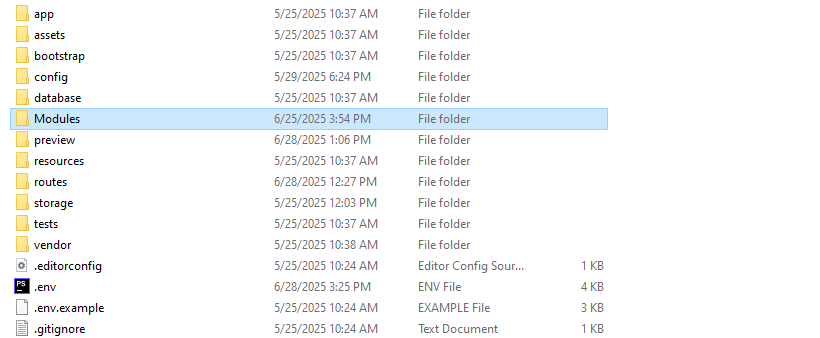
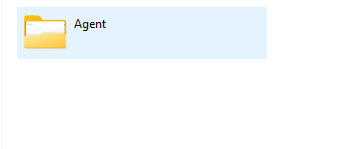
  • Step 02: Unzip and paste the Agent addon folder into Modules Folder

  • Step 03: Refresh your browser after logged in Admin Panel and open the Addon Manager menu from the sidebar. Activate the Agent Module addon.
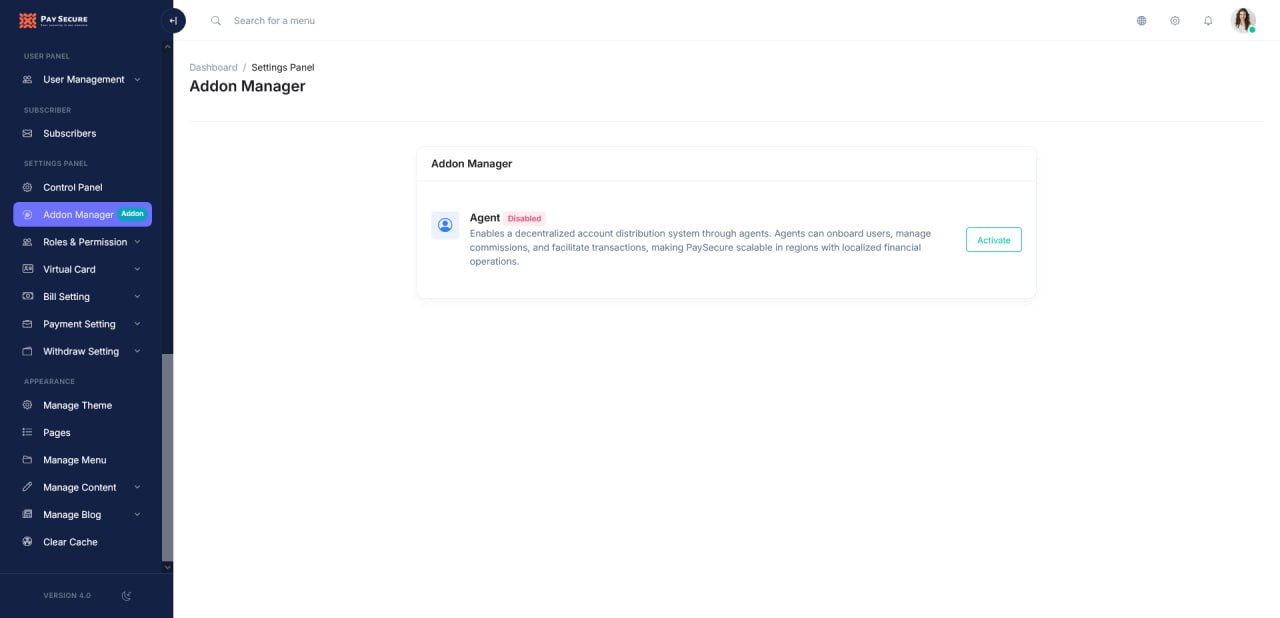
  • Step 04: Once activated, the Agent Module will be fully available for use in your project. Go to Agent Configuration and adjust the settings as needed for your agent
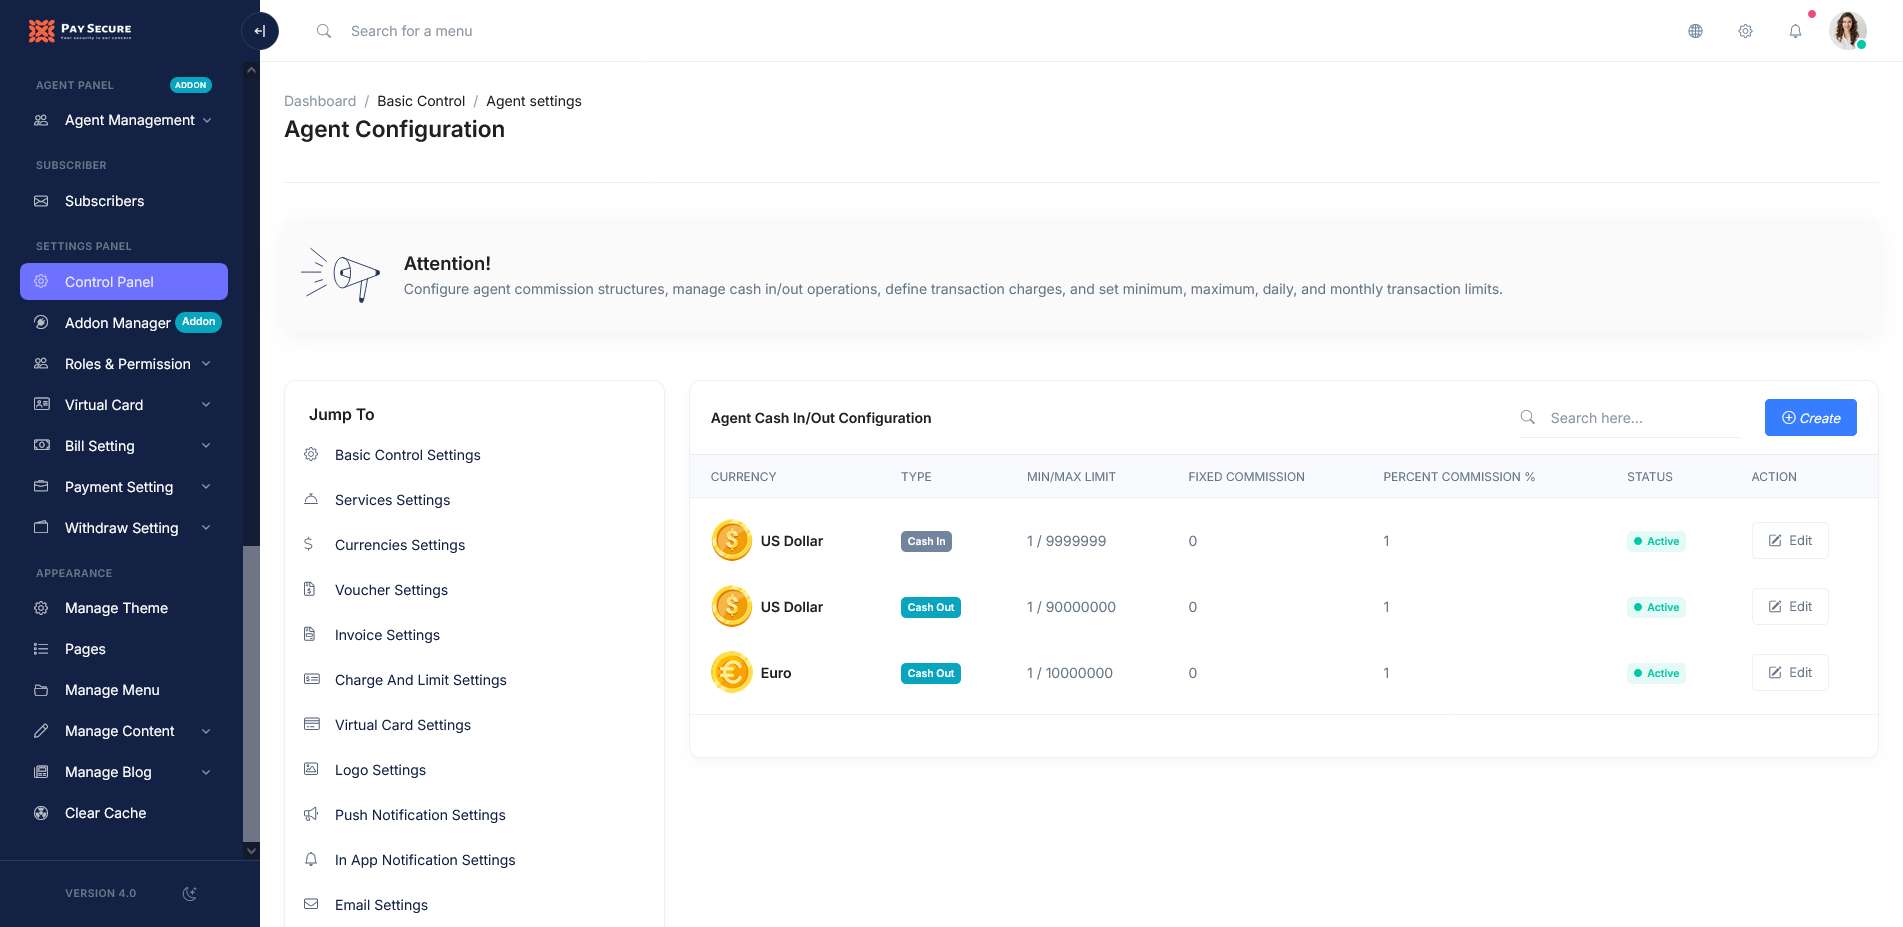
  • Step 05: From the Agent Management menu you can create new agent, edit existing ones, or delete them as needed
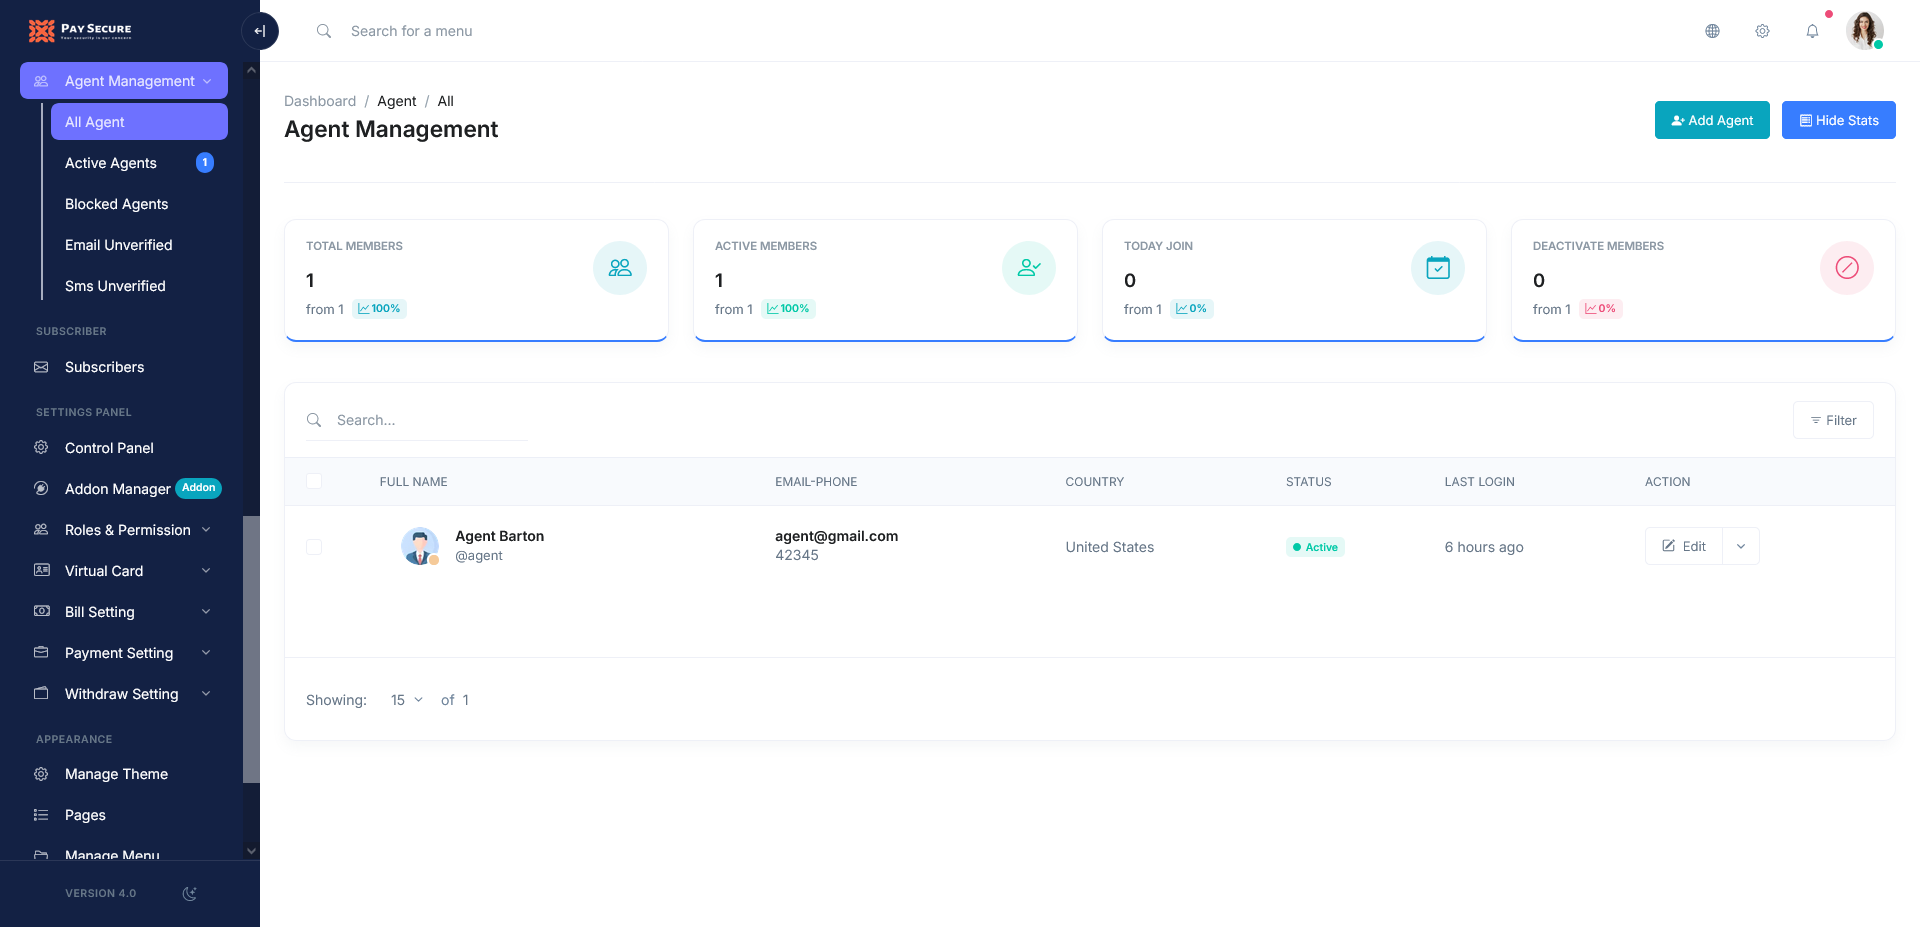
  1. Still stuck?
    Get Support

Agent Feature

  • Feature 01: Agents can view all their activities and transactions from one centralized dashboard
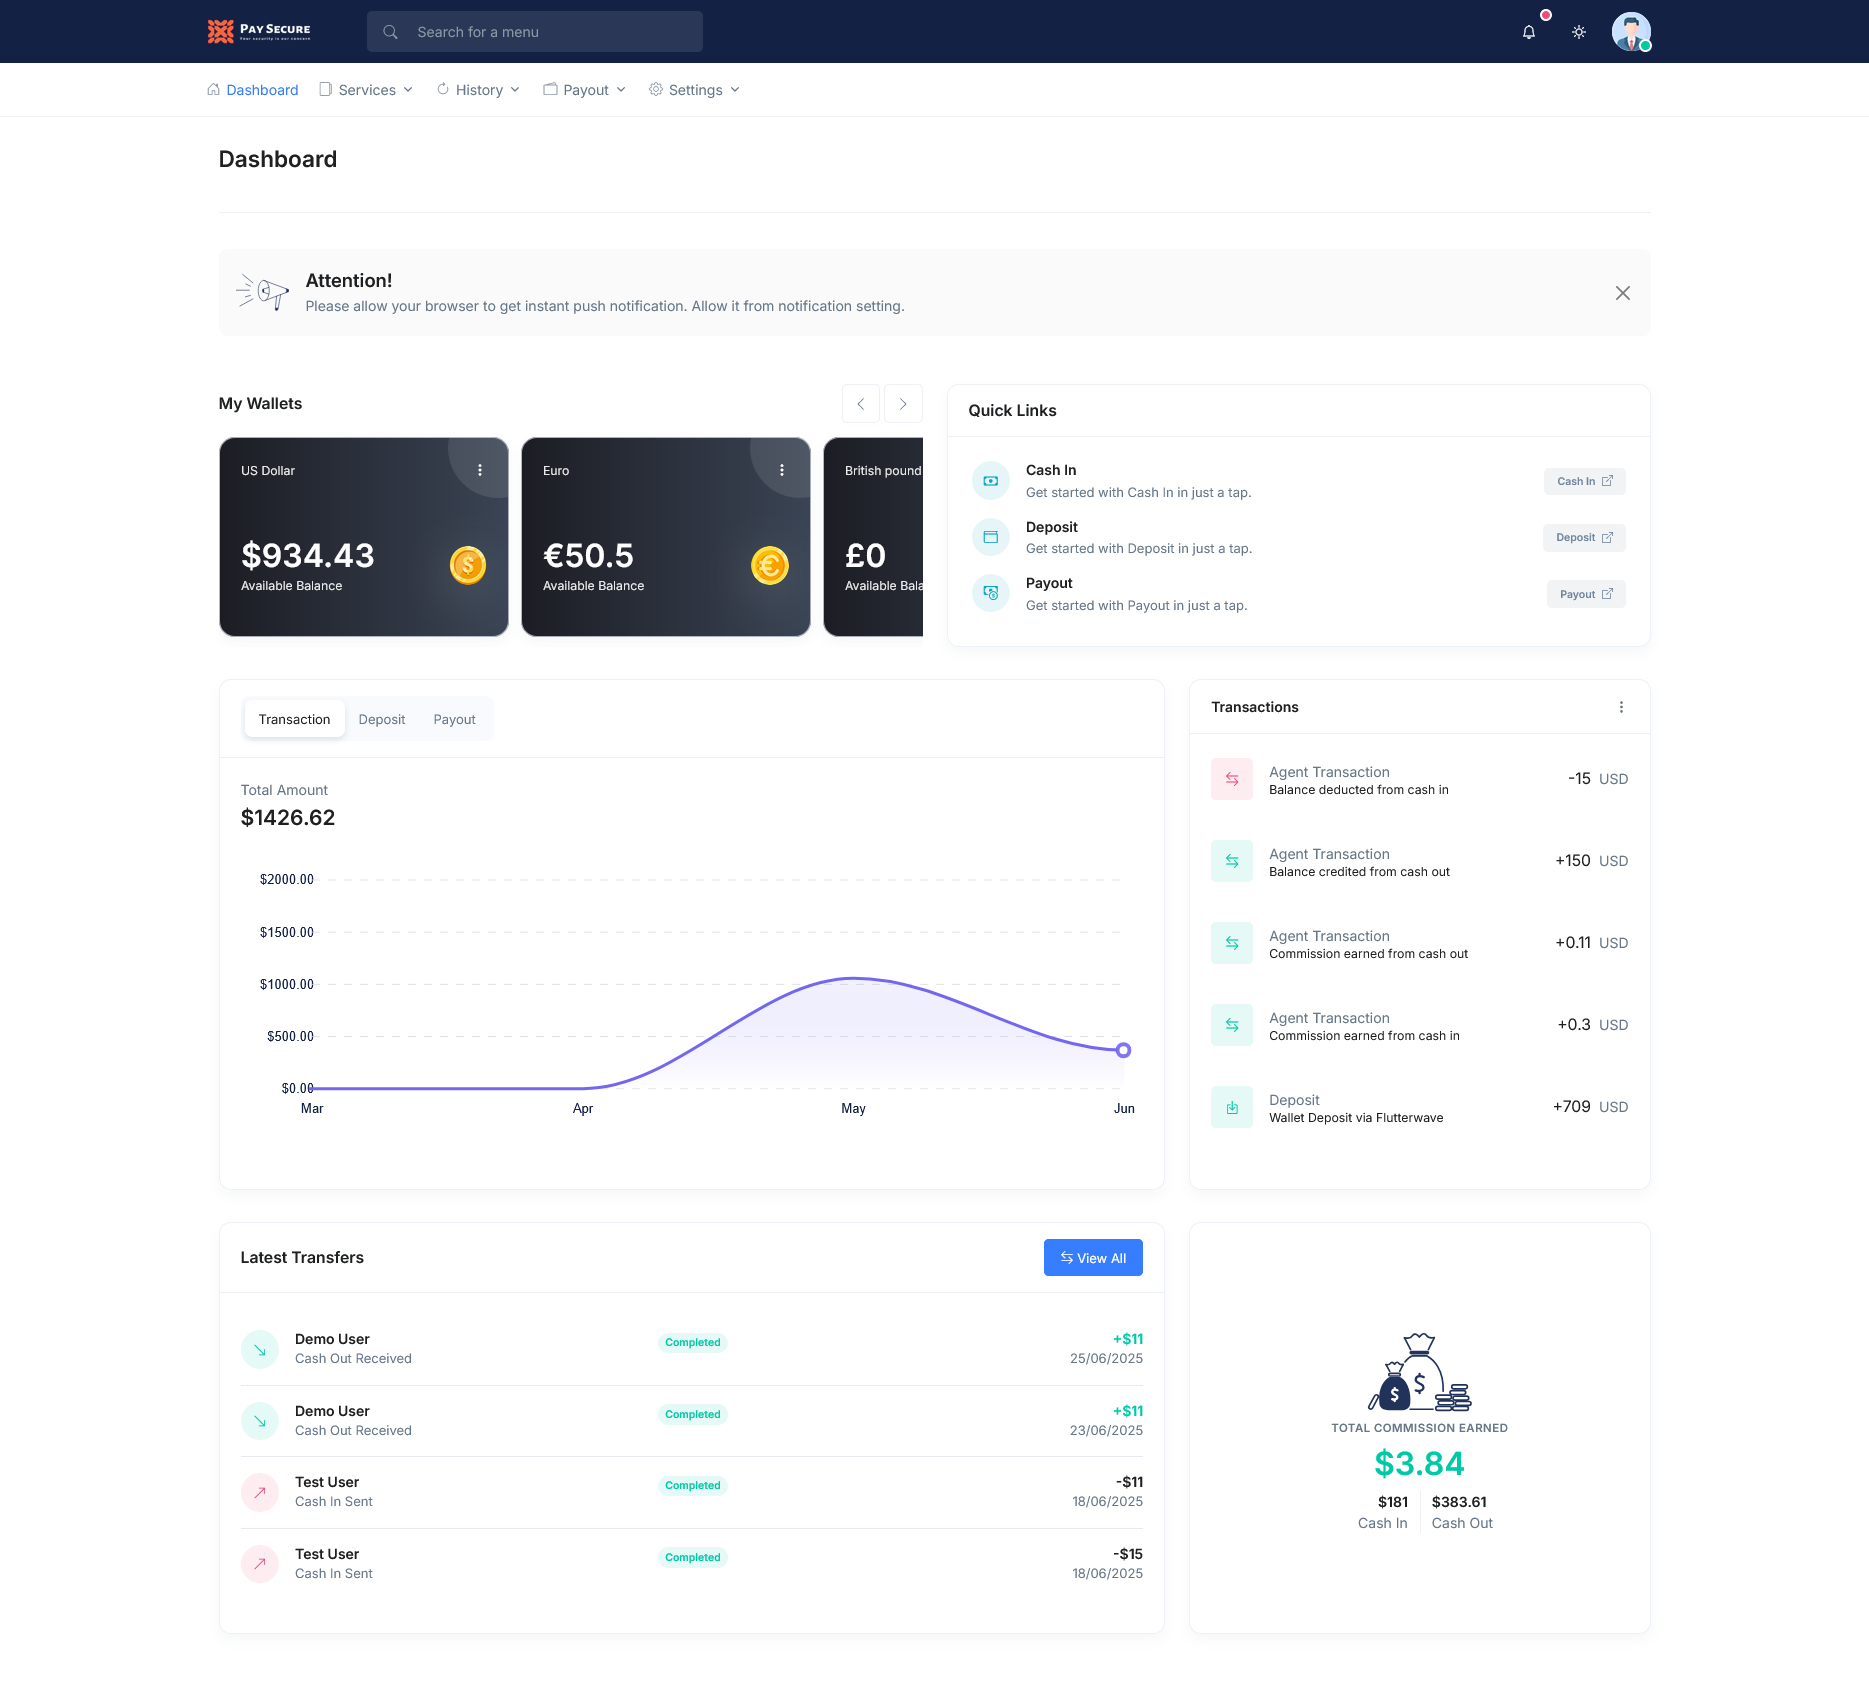
  • Feature 02: Agents can securely cash in to user accounts with instant balance updates.
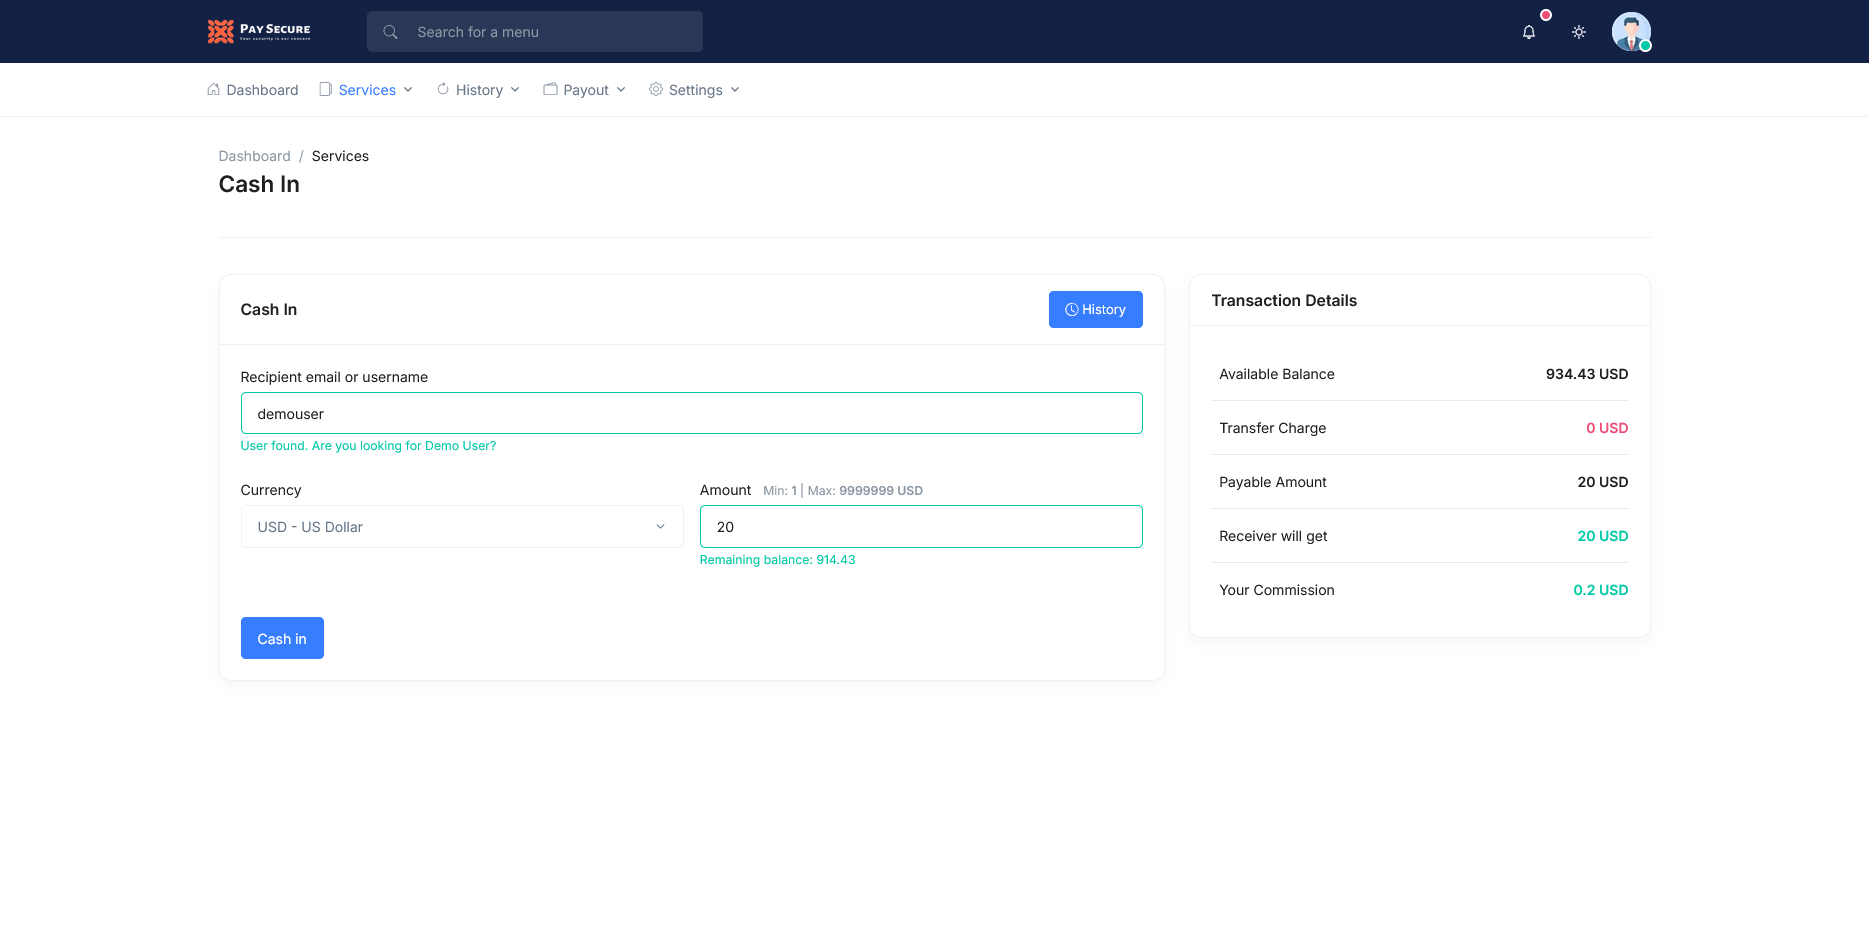
  • Feature 03: Generate detailed statements to track every agent transaction with full transparency.
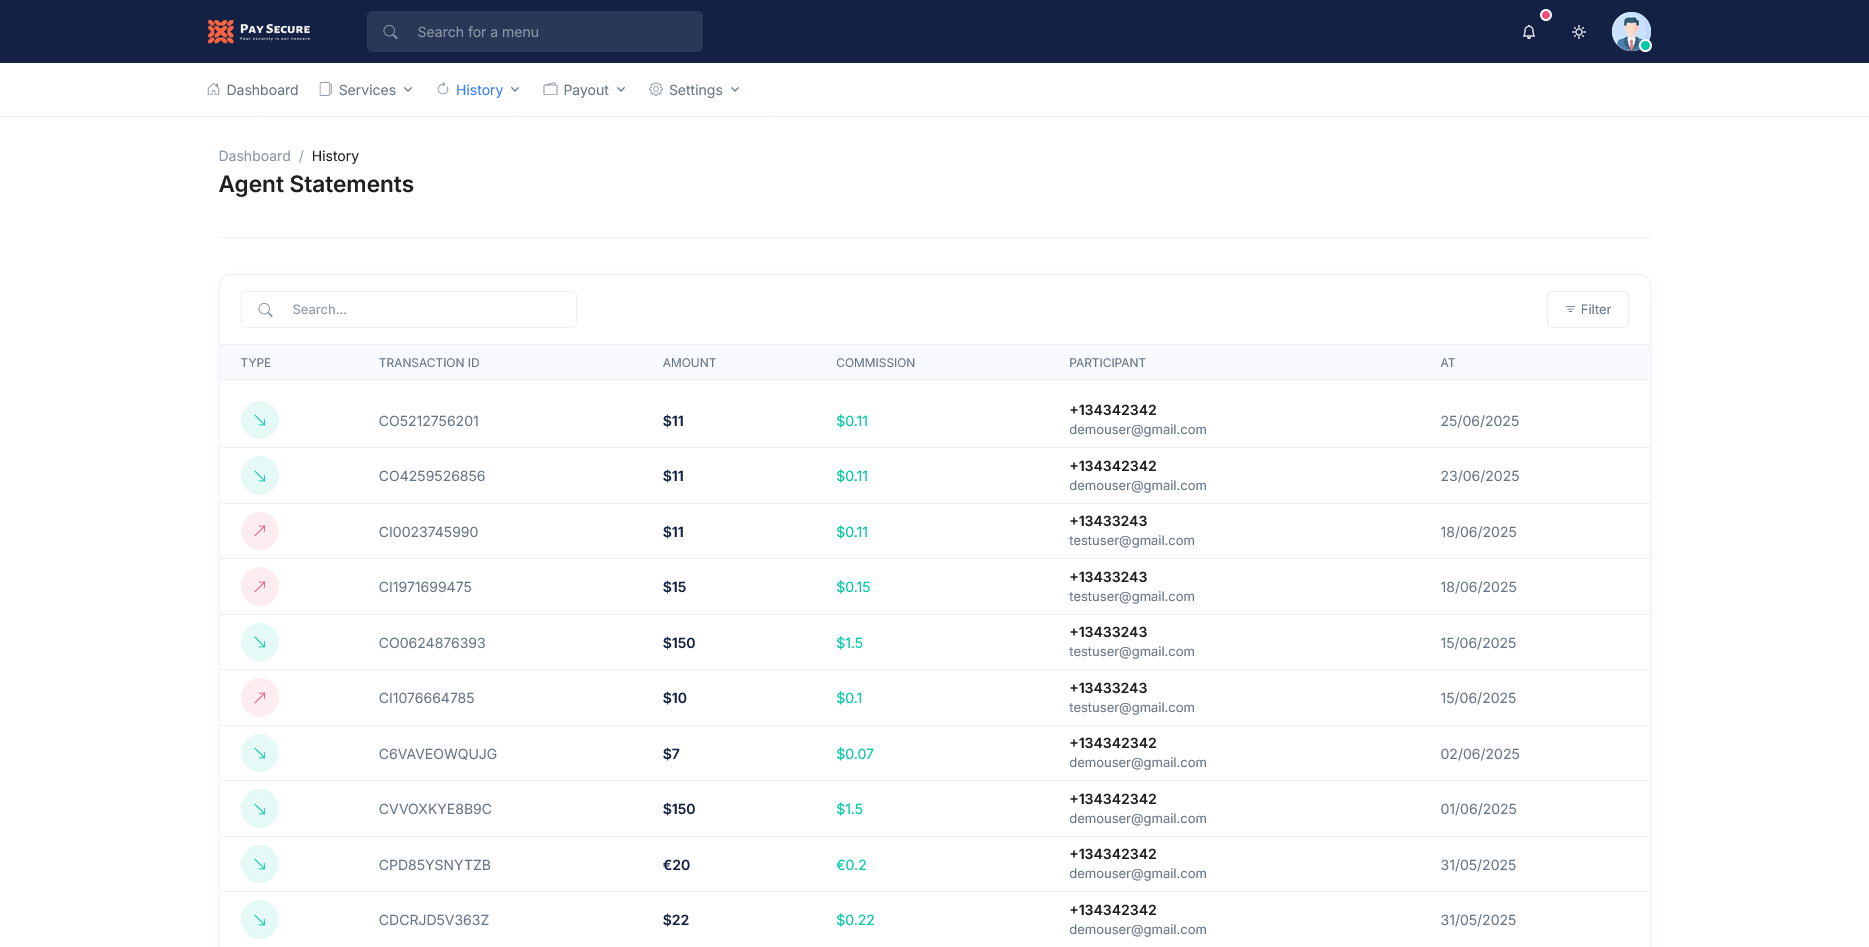
  • Feature 04: Users can easily withdraw funds by requesting a cash-out from any active agent