App Settings
App Requirements
Download and install Any one from these IDE(Android studio, Vs Code) on your computer.
-
Source Android Studio:https://developer.android.com/studio
-
Source VS Code:https://code.visualstudio.com/download
Setup Flutter and Dart SDK in your computer if you want to modify the source code
Must installed Flutter and dart plugin on your IDE
Installation
After downloading the file, you will receive a ZIP archive. Once you extract it, you will find
Documentation Folder and
Provider App
»
 servat-provider-app-flutter.zip
the source code included
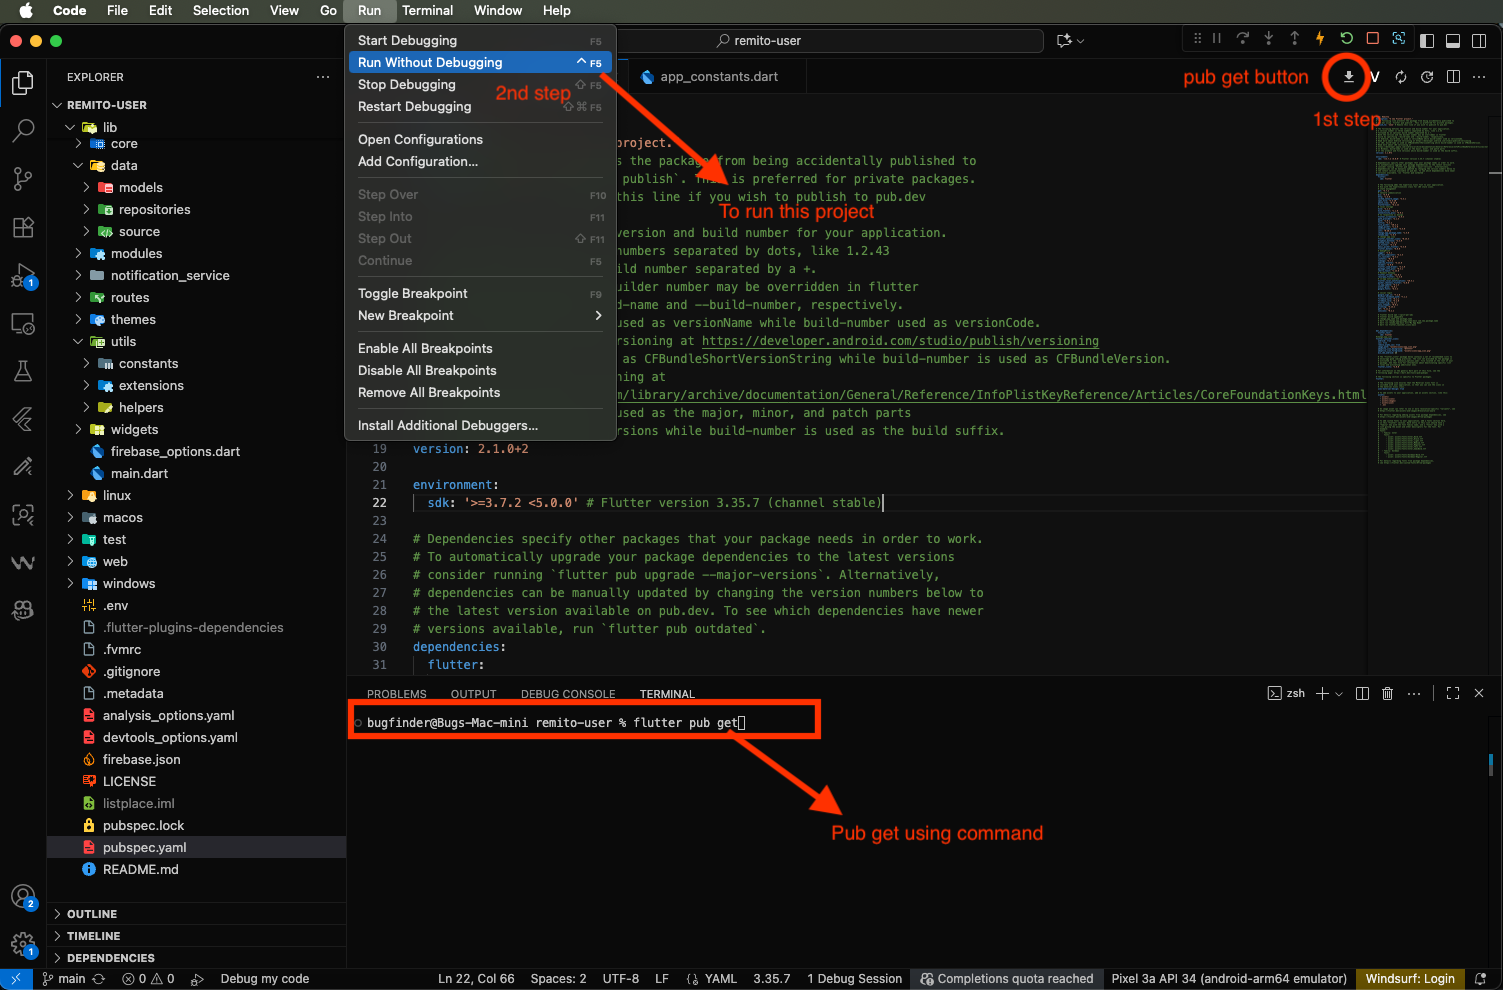
- Unzip the source code and open it in your IDE.
- On
pubspecs.yamland Run flutter pub get in your IDE terminal or click "Pub get" in Android Studio / VS Code. - Connect an emulator or physical device and click the Run button to launch the application.
Flutter Packages
-
GetX (get)State management, route management, and dependency injection.
-
Dio & HTTP :RESTful API communication and network requests.
-
Flutter Zoom Drawer :Modern slide-out drawer menu navigation.
-
Agora RTC Engine :In-app voice calling integration.
-
Pusher Channels & Flutter Local Notifications:Real-time chat & push notifications.
-
PDF & Printing :Generating and previewing booking invoice documents.
-
Hive & Hive Flutter :Lightweight local data caching and storage.
-
Google Maps Flutter & Map Location Picker :Location selection and area mapping.
Folder Structure
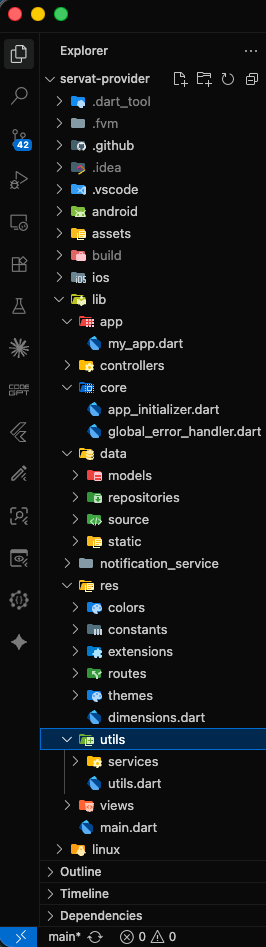
All you need to follow the lib(Library) Folder for any logical and UI changes in this project.
-
App Folder »Contains MyApp widget configuration and root app setup.
-
Controller Folder »Handles business logic and state management using GetX.
-
Core Folder »Contains app initializer and core setup logic.
-
Data Folder »Manages API calls, data models, repositories, and static data sources.
-
Notification Service Folder »Handles push notifications via Flutter Local Notifications and Pusher.
-
Res Folder »Includes app colors, constants (BASE_URL, API endpoints), extensions, routes, and themes.
-
Utils Folder »Provides helper functions, logging, validation, and utility methods.
-
View Folder »Contains all application screens (23 screen modules) and reusable UI widgets.
Screens
-
Splash Screen
-
Onboarding Screen
-
Sign In Screen
-
Provider Registration (Sign Up) Screen
-
Forgot Password Screen
-
Email & SMS Verification Screen
-
Identity (KYC) Verification Screen
-
Provider Dashboard / Home Screen (Statistics, Overview, Charts)
-
Drawer Navigation Screen (Zoom Drawer)
-
Service List Screen
-
Create & Edit Service Screen
-
Service Details Screen
-
Service FAQ Management Screen
-
Service SEO Settings Screen
-
Service Recycle Bin Screen
-
Category & Subcategory Screen
-
Serviceman / Staff List Screen
-
Add & Edit Serviceman Screen
-
Serviceman Recycle Bin Screen
-
Booking List Screen (All, Pending, Accepted, Completed, Cancelled)
-
Booking Details Screen
-
Assign Serviceman Screen
-
Invoice Preview & Generator Screen
-
Job Requests List Screen (Customer Bidding Requests)
-
Place Offer / Bid Screen
-
Subscription Packages Screen
-
Subscription Payment Screen (Card, Manual, Webview)
-
Subscription Purchase History Screen
-
Custom Booking Form Builder Screen
-
Available Coverage Area Screen
-
Advertisement List Screen
-
Create & Edit Advertisement Screen
-
Coupon List & Create Coupon Screen
-
Withdraw / Payout Method & Request Screen
-
Withdraw History & Details Screen
-
Transaction History Screen
-
Inbox / Real-time Conversation Screen
-
Agora Voice Call Screen
-
Notification Screen
-
Support Ticket List, Create & Reply Screens
-
Profile Settings Screen & Edit Profile
-
Change Password Screen
-
2FA Security Screen
-
Delete Account Screen
-
Business & App Configuration Settings Screen
Setup Application
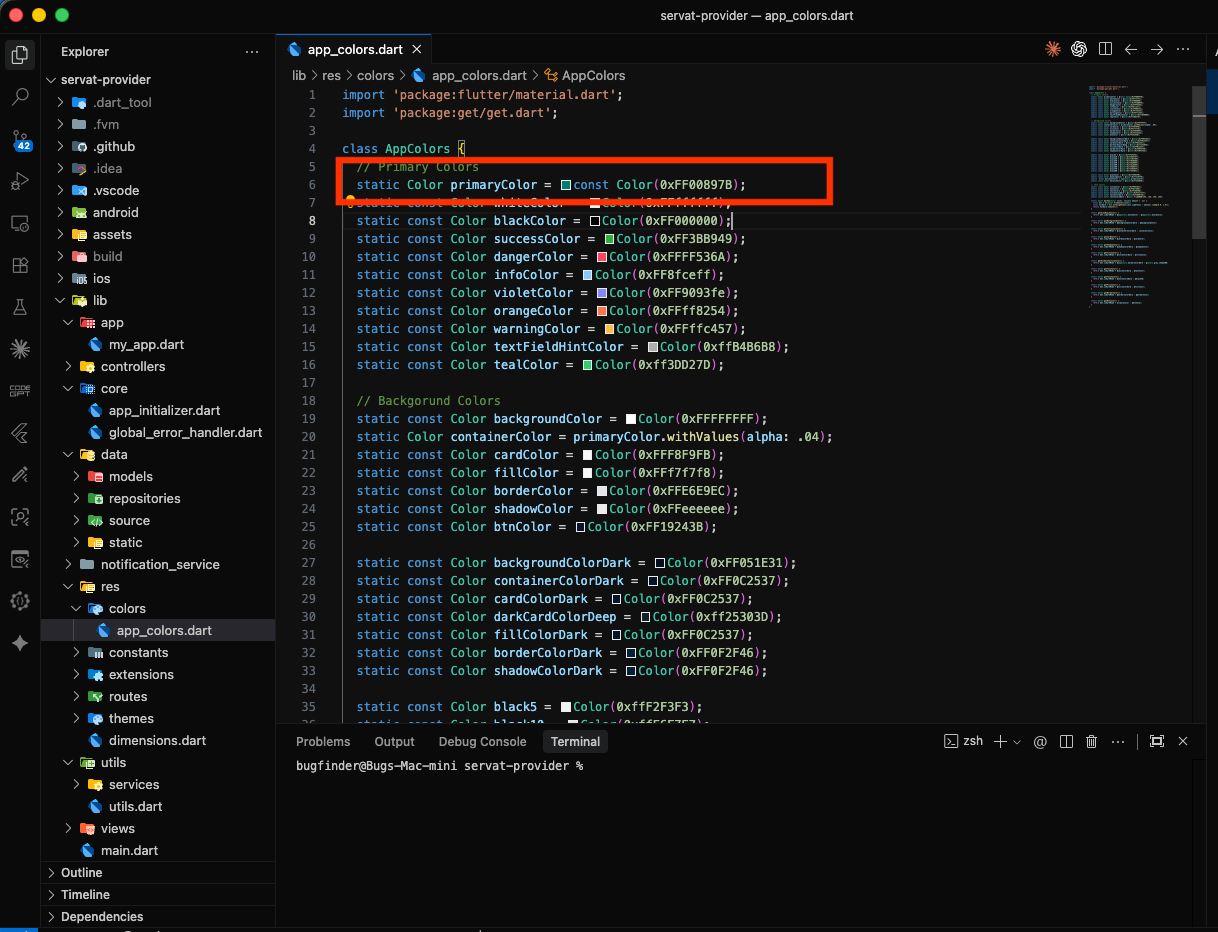
Change App Primary color Open :
lib
-
res
-
Colors
- app_colors.dart
-
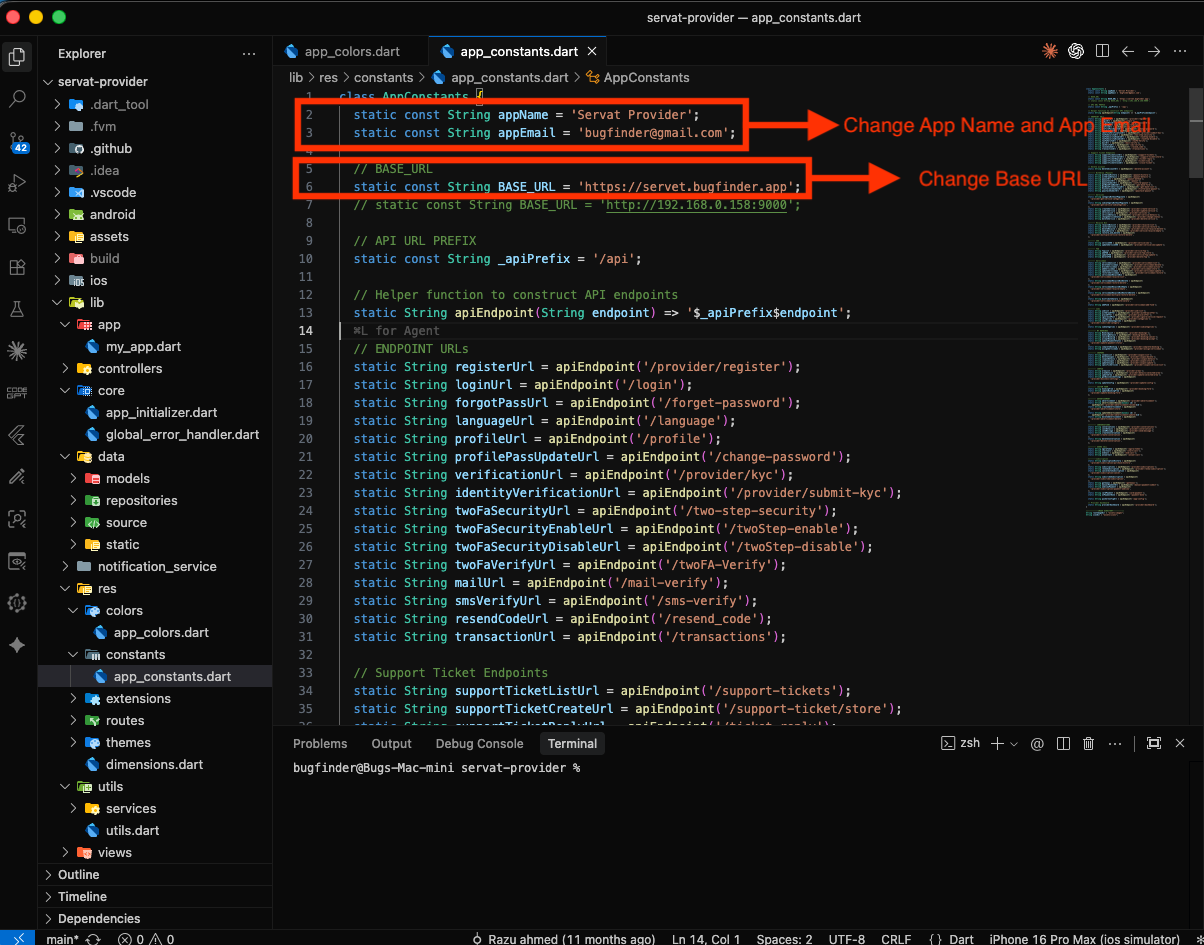
Change App Base_Url: Open :
lib
-
res
-
constants
- app_constants.dart
-
Google Map Setup:
- Create a Google Cloud project.
- Enable Maps SDK for Android.
- Enable Maps SDK for iOS.
- Create the required API keys.
- Restrict the Android API key to the appropriate app/package.
- Restrict the iOS API key to the appropriate Bundle ID.
- Configure the API keys in the project.
- Run the application and verify that the map screen works correctly.
-
Full documentation:https://developers.google.com/maps/flutter-package/config
Env Configuration:
-
Copy
.env.exampleto.env. - Add your own API credentials.
- Never use credentials from the demo or developer environment.
- Restart the application after updating the configuration.
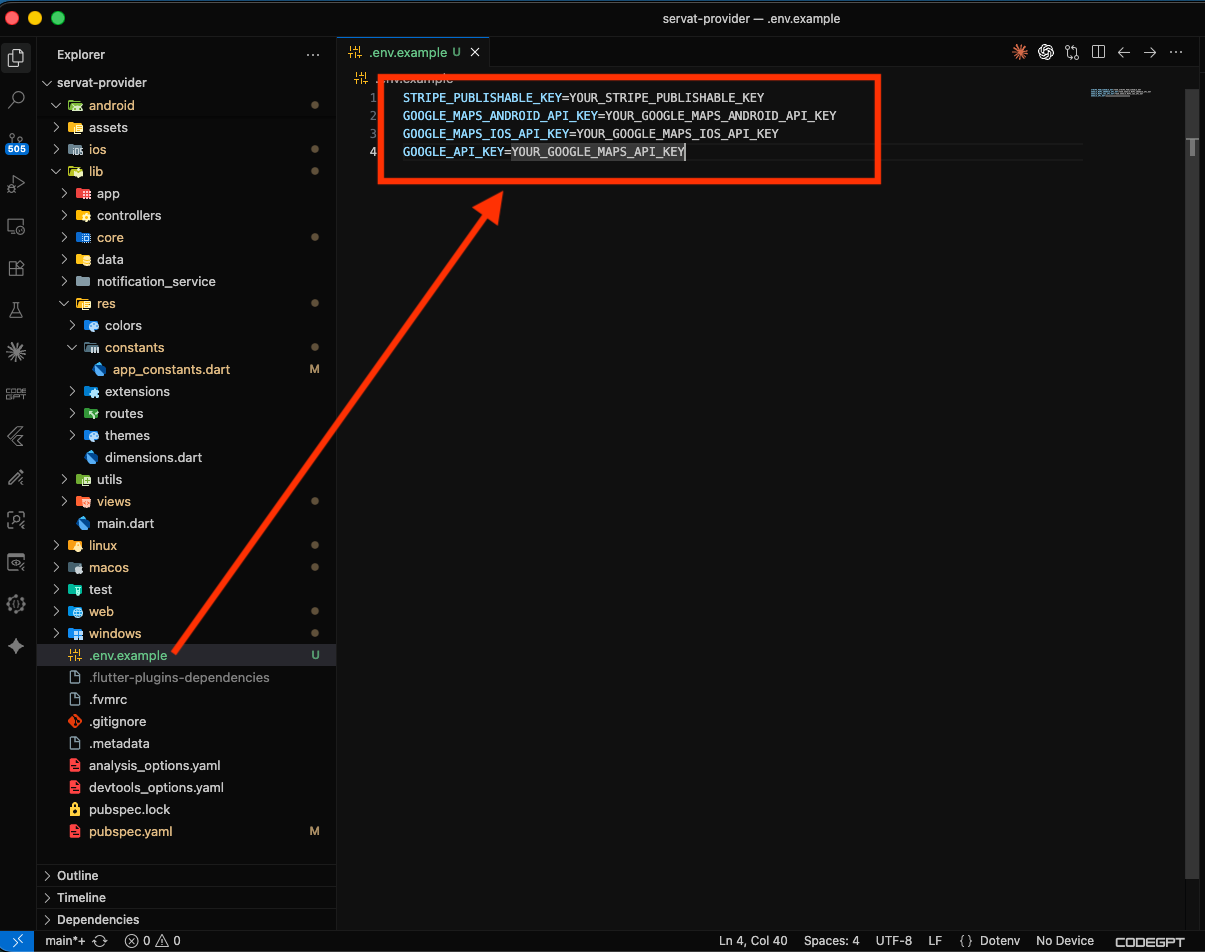
-
For change the app name please follow:https://pub.dev/packages/rename_app
-
For change the app icon please follow:https://pub.dev/packages/flutter_launcher_icons
-
For change the app package name please follow:https://pub.dev/packages/change_app_package_name
Publish App
1. Android
Follow the guidelines publish the app to Play Store.
-
PlayStore:https://flutter.dev/docs/deployment/android
2. IOS
Follow the guidelines publish the app to AppStore.
-
AppStore:https://flutter.dev/docs/deployment/ios
Third-Party Services Setup
Important Third-Party Services and Additional Costs
Servat integrates with external services, including Google Maps, Agora, SMS gateways, and AI service providers. These services are not included in the item purchase price.
Buyers must create and configure their own accounts, API keys, credentials, and billing methods for these services. Usage, subscription, messaging, calling, mapping, or AI processing fees may be charged separately by the respective third-party providers.
1. Google Maps Setup
- Go to the Google Cloud Console and create a project.
- Enable Maps SDK for Android and Maps SDK for iOS, along with Places API and Geocoding API.
- Create API Keys and restrict them to your Android Package Name (with SHA-1) and iOS Bundle Identifier.
- Add the API keys into your
.envfile underGOOGLE_MAPS_ANDROID_API_KEYandGOOGLE_MAPS_IOS_API_KEY. - Ensure the key is also added in
android/app/src/main/AndroidManifest.xmlundercom.google.android.geo.API_KEY. - Ensure the key is also added in
ios/Runner/AppDelegate.swiftunderGMSServices.provideAPIKey("YOUR_KEY_HERE").
2. Agora RTC Voice Calling Setup
Servat Provider includes built-in voice calling powered by the Agora RTC SDK, enabling instant communication between providers and clients:
- Register an account on Agora.io Console.
- Create a new Project and obtain your App ID and App Certificate.
- Configure the Agora credentials on your backend admin panel under Third-Party Settings.
- The mobile app automatically fetches dynamic RTC tokens from the backend (
/api/agora/token).
3. Pusher Real-Time Chat & Notifications
Real-time chat messaging and order notifications are orchestrated via Pusher Channels:
- Create an application on Pusher Channels.
- Set up your Pusher App Key, Secret, and Cluster in your Backend Admin Settings.
- The mobile application dynamically initializes Pusher channels via
/api/app-configon startup.