Email Settings
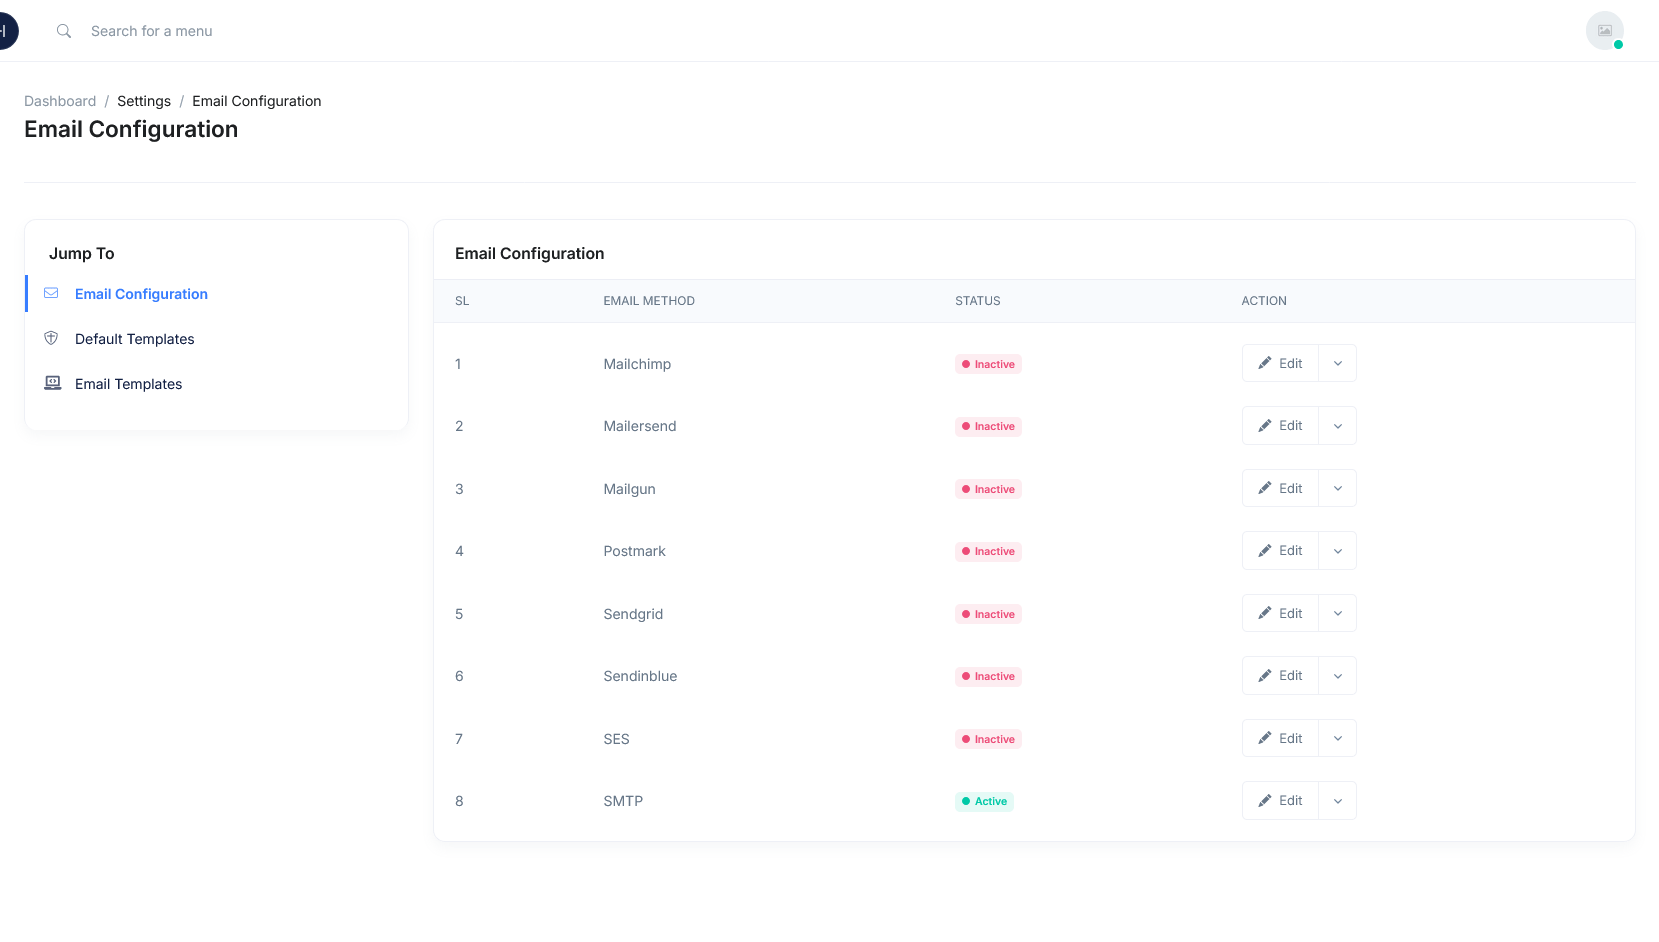
Before the system can send any emails (such as registration, password reset, order confirmation, or notifications), you must configure the Email Settings.👉 Go to Admin Panel → Control Panel → Email and complete the SMTP setup.
👉 Without this setup, no system email will be delivered to users.
Once SMTP is configured, you can manage the default template and customize individual email templates to match your branding.
-
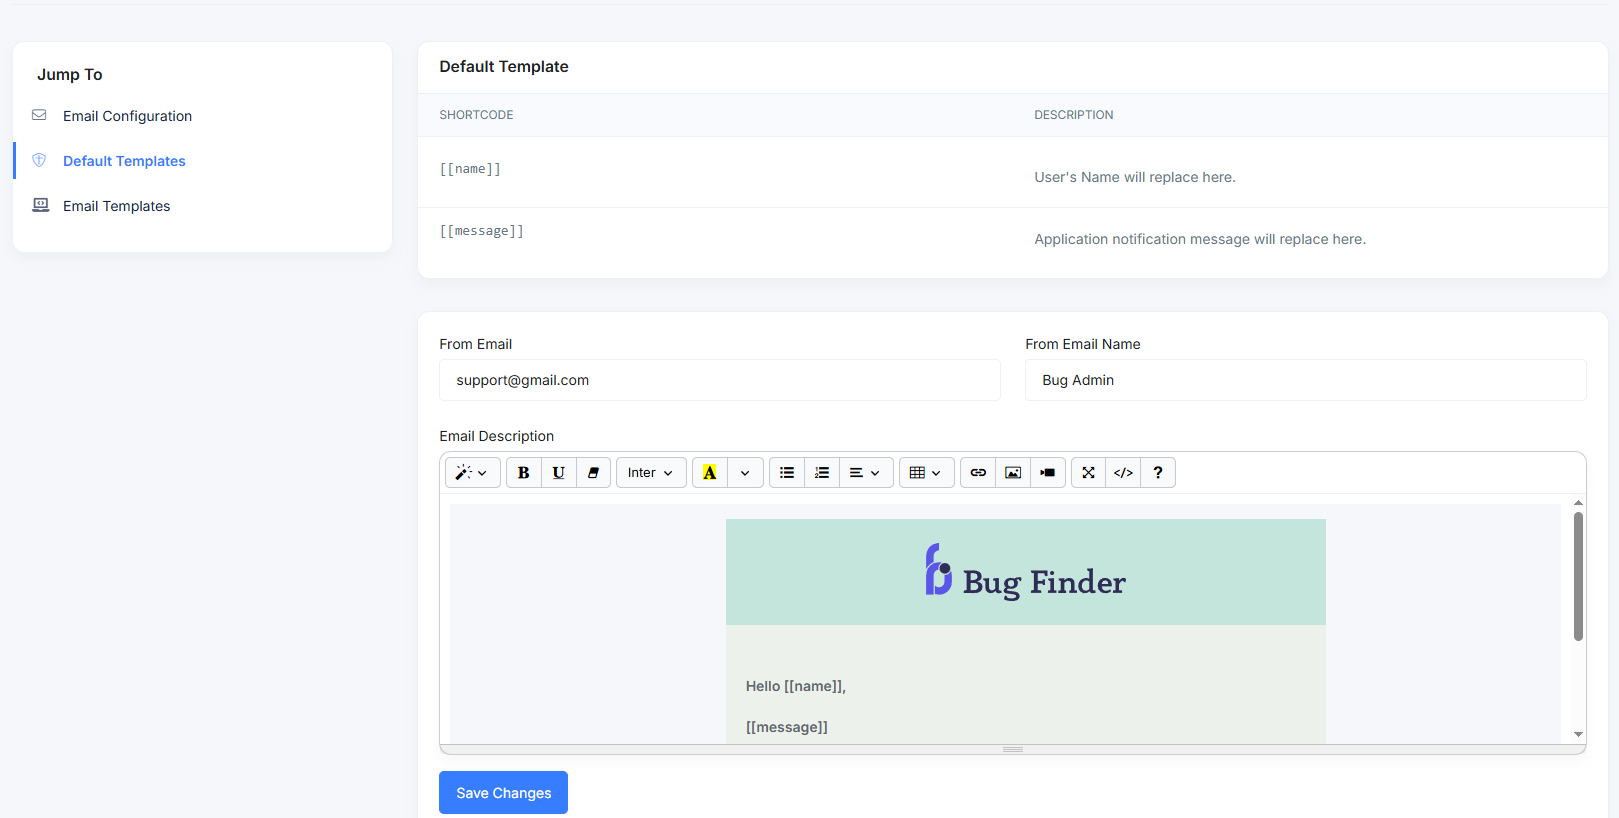
Step 04- Setup Default Email Template- Go to 👉 Default Template
- From Email (the email that users will see)
- From Email Name (your brand name)
- Email Description Here you can define the header and footer content that will be applied to all outgoing emails
- Example: Add your logo, footer text, company details, or disclaimer
-
Step 05- Customize Individual Email Templates- Navigate to 👉 Email Templates
- You will see predefined templates (e.g., User Registration, Forgot Password, Payment Confirmation, etc.).
- From Email Name (your brand name)
- You can:
- Edit content (change text, add your brand tone).
- Insert dynamic variables what recommended above the table (like [[user_name]], [[username]], etc.)
- Enable/Disable certain templates.

-
Step 06- Send & Verify- Perform an action (like user registration, password reset, order placement).
- Check your email inbox to verify the correct template and design.
✅ That’s it! Now your system is fully ready to send professional email notifications to users using SMTP and your customized templates.
