App Settings
App Requirements
Download and install Any one from these IDE(Android studio, Vs Code) on your computer.
-
Source Android Studio:https://developer.android.com/studio
-
Source VS Code:https://code.visualstudio.com/download
Setup Flutter and Dart SDK in your computer if you want to modify the source code
-
Must installed Flutter and dart plugin on your IDE
Installation
After downloading file from codecanyon you will get a zip file. Extracting the zip file you will get Documentation Folder and »
project.zipincluded in there:- Unzip the source code and open it in your IDE.
- On your IDE find for
pubspecs.yamlfile then click on pub get on top right side your IDE. li> - Please make sure your flutter and dart SDK updated.
- Open an emulator or connect a real device and then click on Run Button for compile the project.
Note
We used these version for development Flutter 3.16.0
Folder Structure
All you need to follow the lib(Library) Folder for any logical and UI changes in this project.
-
Controller Folder »All of the logic implemented here.
-
Data Folder »API integration and error handle.
-
Routes Folder »All app routes declared here.
-
Config Folder »App text styles and colors are declared here.
-
Notification_service Folder »Handle both in app notifications and push notifications.
-
Theme Folder »Control the theme Dark and light mode.
-
Utils Folder »App constants, local storage and helper class are definded here..
-
View Folder »All of the screen UI and component here.

Screens
-
Splash screen
-
Onboarding screen
-
Create new password screen
-
Forgot password screen
-
Login Screen
-
SignUp Screen
-
Buy id screen
-
Buy id details screen
-
Buy id payment screen
-
Chatting screen
-
Home screen
-
Topup order screen
-
Voucher order screen
-
Gift card order screen
-
Id purchase screen
-
My offer Screen
-
My offer details screen
-
Create post screen
-
Sales post screen
-
Sales post details screen
-
Notification Screen
-
Add fund screen
-
Withdraw screen
-
Manual payment screen
-
Card Payment Screen
-
Payment Log screen
-
Withdraw Log screen
-
Transaction screen
-
Profile Settings screen
-
Change password screen
-
Edit Profile screen
-
Shop Category screen
-
Shop Category details screen
-
Payment success scene
-
Create Support Ticket screen
-
Support Ticket List screen
-
Support Ticket View screen
-
Identity Verification screen
-
Address Verification screen
-
TwoFa screen
-
Verification Check screen
Setup Application
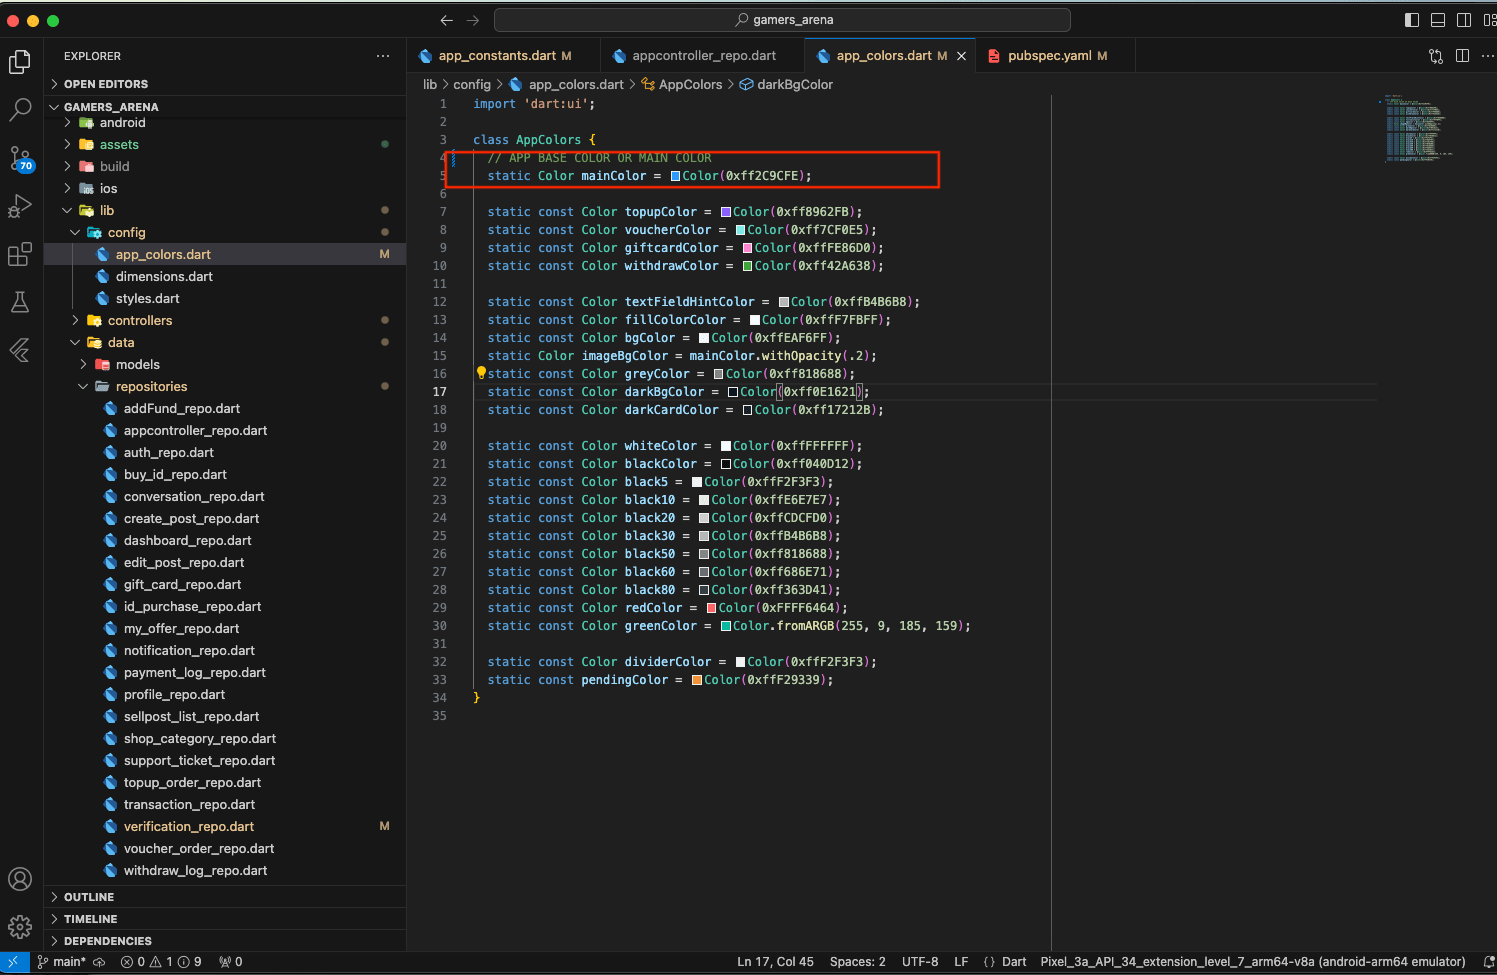
Change App Primary color Open :
lib
-
config
-
- app_colors.dart
-

-
For change the app name please follow:https://pub.dev/packages/rename_app
-
For change the app icon please follow:https://pub.dev/packages/flutter_launcher_icons
-
For change the app package name please follow:https://pub.dev/packages/change_app_package_name
Firebase Setup in Flutter app
To set up Firebase in your Flutter app, please follow the official documentation carefully:
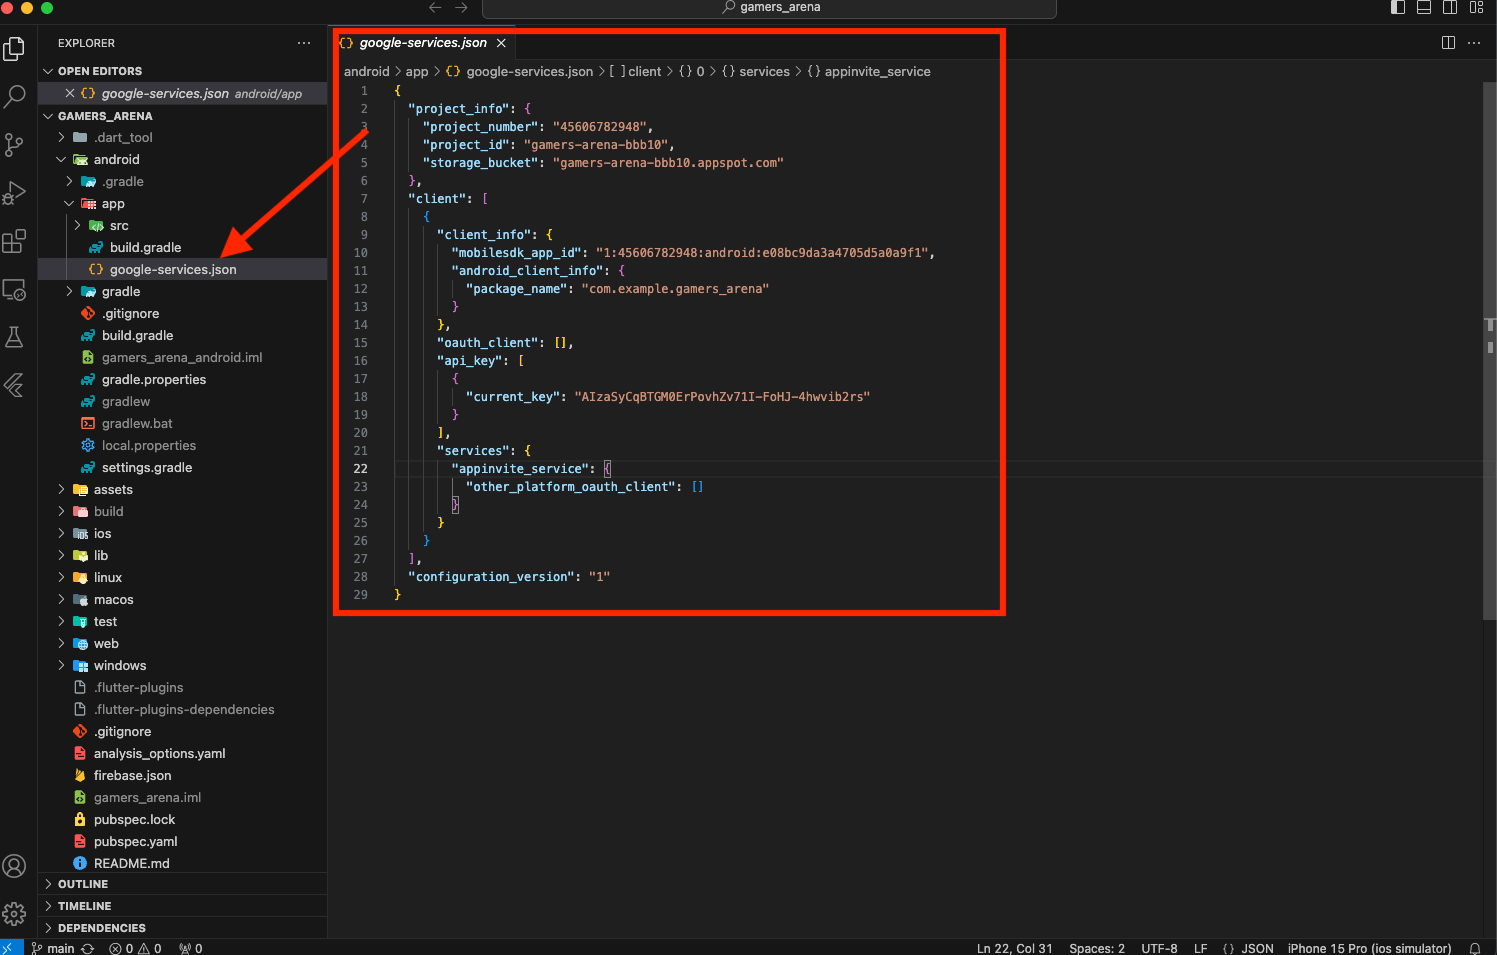
NB : After following this documentation, ensure that the credentials are successfully replaced with your own credentials as shown in the image below.android
-
app
-
- google-services.json
-

Connect your Flutter App with your server:
-
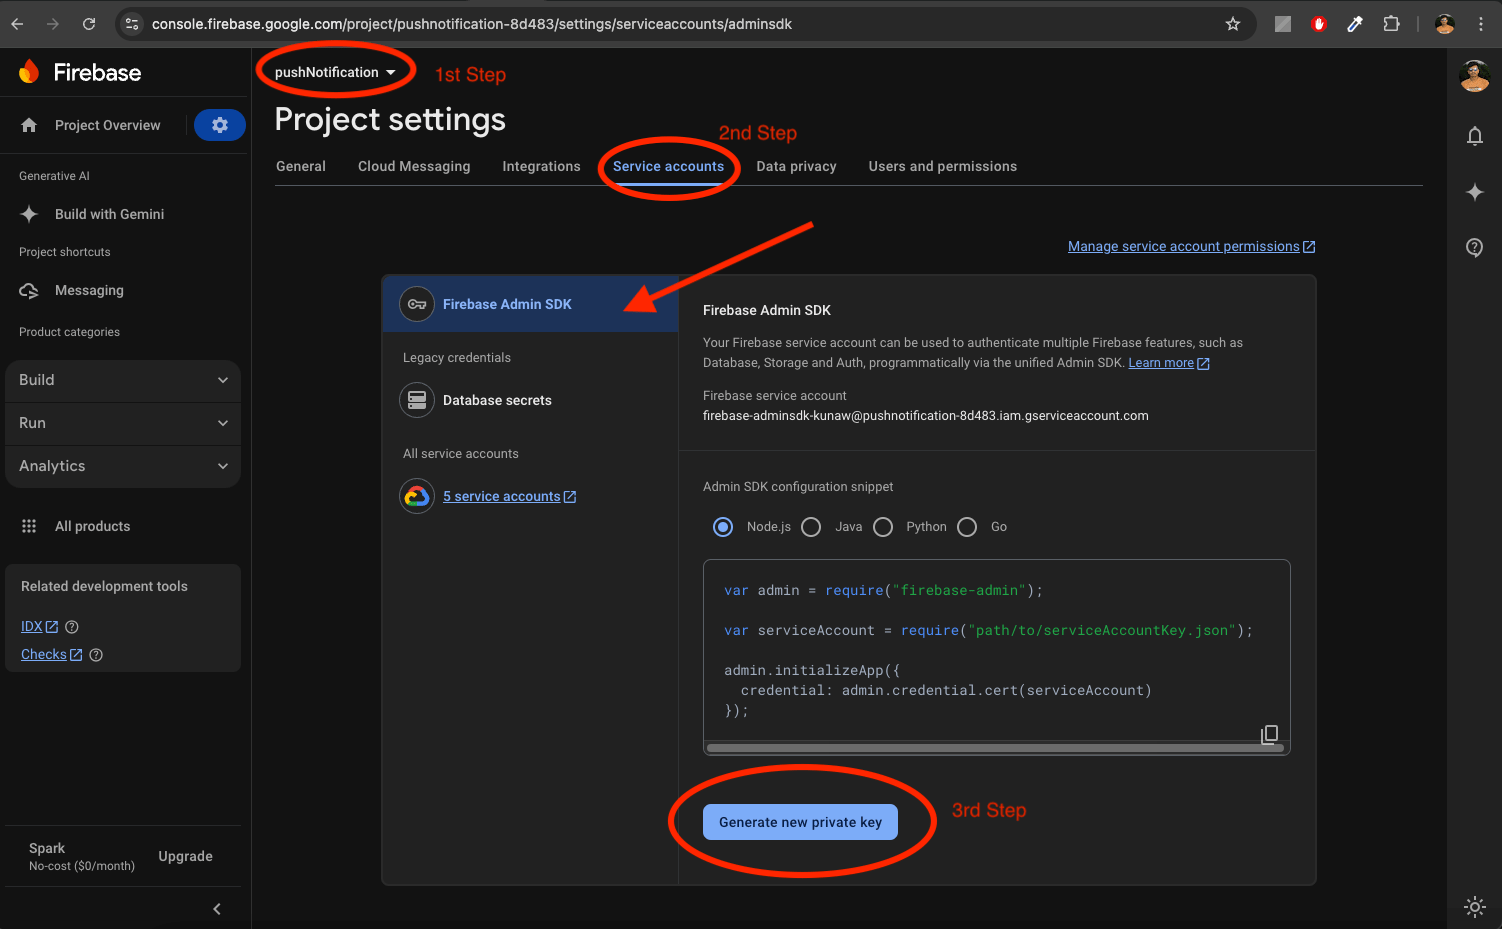
In the Firebase console, open Settings > Service Accounts.
-
Click Generate New Private Key, then confirm by clicking Generate Key.
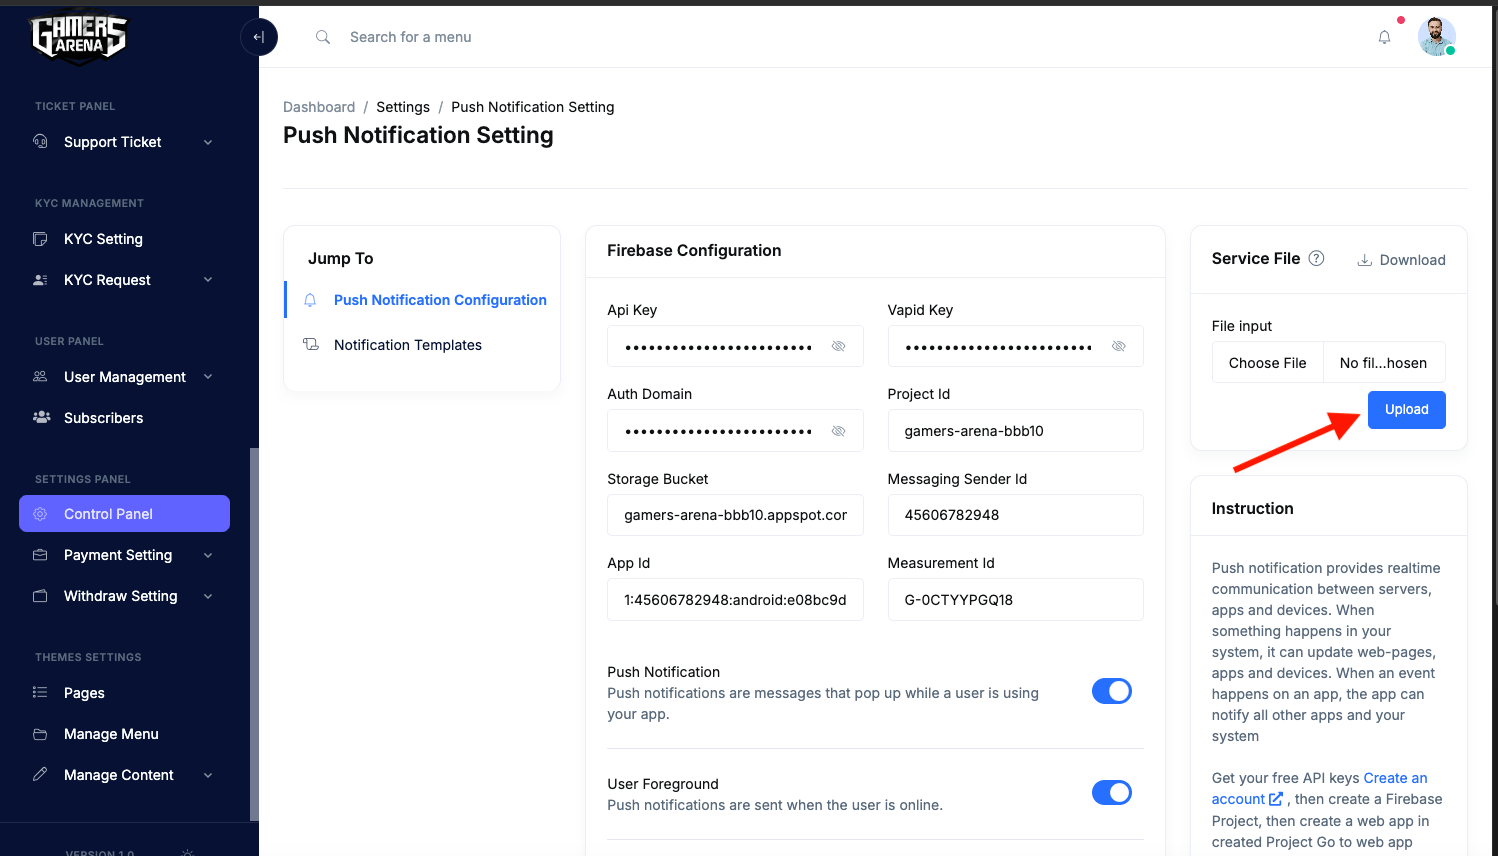
 After clicking the "Generate new private key" button, a JSON file will download. Simply upload this file by clicking the button shown in the image below.
Publish App
1. Android
Follow the guidelines publish the app to Play Store.
-
PlayStore:https://flutter.dev/docs/deployment/android
2. IOS
Follow the guidelines publish the app to AppStore.
-
AppStore:https://flutter.dev/docs/deployment/ios
